Slide workbooks
Slide workbooks are available with think-cell Suite.
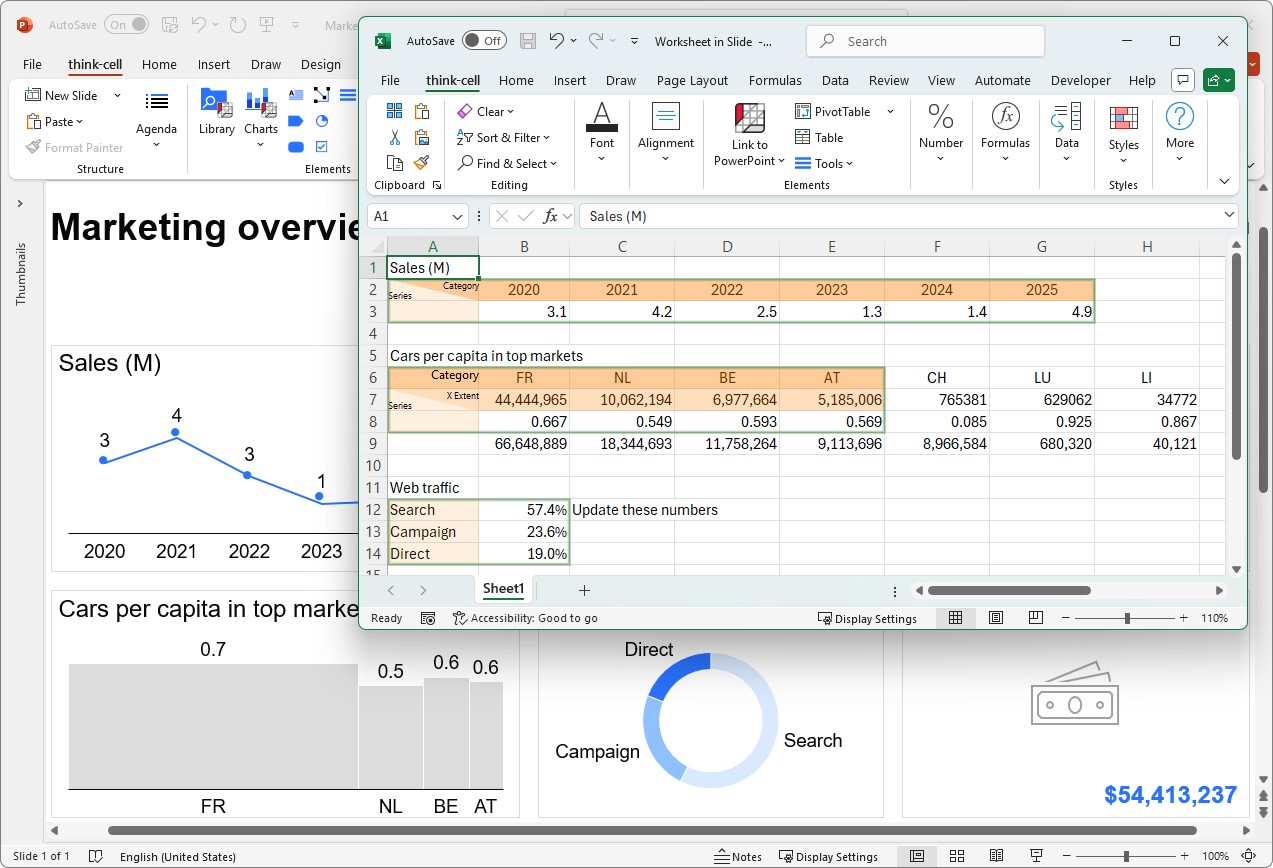
A slide workbook is a fully functioning Excel workbook that is built into a PowerPoint slide. Here's what you can do with a slide workbook:
- Manage the data for all think-cell charts and other elements on a slide in one place.
- Add comments and calculations that you don't want to show on your slide.
- Create a chart and a table from the same data range (see Duplicate chart data as a table).
- Save the slide workbook to your computer as an Excel file.
Caution: When you copy and paste a slide, the slide workbook is copied with the slide. Any think-cell users who have access to the slide can also access the slide workbook.
Open the slide workbook
To open the slide workbook, on the PowerPoint ribbon, select Insert > think-cell > Tools 
![]() . The slide workbook stays open while you edit your slide. When you close the workbook, think-cell automatically saves your changes.
. The slide workbook stays open while you edit your slide. When you close the workbook, think-cell automatically saves your changes.
To jump to the location of an element's data in the slide workbook, do one of the following:
- Charts: Double-click the chart. Alternatively, select the chart, then select Open Datasheet

- Other elements: Right-click the element, then select Open Datasheet
Link elements to the slide workbook
You can create Excel data links between elements on a slide and that slide's workbook (see Excel data links). A slide workbook can only contain links to elements on its associated slide.
Elements that are linked to a slide workbook do not appear in the Data Links dialog (see Manage linked data with the Data Links dialog).
Here's how you can link elements to the slide workbook:
Create elements from slide workbook data
To insert an element onto your slide that is linked to the slide workbook, follow these steps:
- On the PowerPoint ribbon, select Insert > think-cell > Tools
 .
. - In the slide workbook, enter the data for the element. If you want to create a chart, make sure that your data matches the chart's data layout.
If you're not sure what the chart's data layout is, insert the chart that you want, link it to the slide workbook (see Link existing elements to the slide workbook), then replace the default data with your own data. Skip the remaining steps in this section. - Select the data.
- On the slide workbook's ribbon, on the Insert tab, open the Link to PowerPoint menu. Then select the element that you want to insert.
- On your slide, click where you want to insert the element.
Link existing elements to the slide workbook
To link an existing element to the slide workbook, follow these steps:
- If the element is linked to an Excel file, first remove the link (see Remove data links).
- Open the element's datasheet (see Element datasheets).
- On the datasheet toolbar, select Move Data to Slide Workbook

Every time that you link an element to the slide workbook, think-cell creates a new sheet in the workbook and inserts the data there. If you then cut and paste the data onto a different sheet, the pasted data will still be linked to the element.
Move element data from the slide workbook to an Excel file
You can move a single element's data to an Excel file, or you can save an entire slide workbook as an Excel file.
Move an element's data to an Excel file
To move an element's linked data from the slide workbook to an external Excel file, follow these steps:
- Remove the element's Excel link (see Remove data links).
- Copy the data to the Excel file.
- Link the data in the Excel file to the element (see Excel data links).
Save a slide workbook as an Excel file
To share and use a slide workbook beyond your current slide, save the slide workbook as an Excel file. The data in the Excel file will not be linked to your elements.
To save a slide workbook as an Excel file, on the slide workbook's toolbar, select File > Save As. Name the file and choose where you want to save it. To learn more, see Save your workbook.
Remove slide workbooks
You can remove one or more slide workbooks from your presentation. You might want to remove slide workbooks after you move element data to an Excel file, or before you share your presentation.
When you remove a slide workbook, element data and its formatting in the workbook move to the elements' datasheets. This applies to all elements except images of tables (see Create images of tables), which lose their data when you remove their slide workbook.
To remove slide workbooks from your presentation, see Clean up and sanitize.
To remove slide workbooks as you send or save slides, see Send and save slides.
To learn about building data-heavy presentations using slide workbooks, read this blog article.
Need to troubleshoot?
Check our knowledge base