Images and icons
- Home
- Resources
- User manual
- think-cell Library: Presentation resources
- Images and icons
Enhance your presentations with think-cell images, such as icons and stock images. Images work smoothly alongside other think-cell elements like charts, tables, and text boxes.

This section explains how to add images and icons from the think-cell library, convert images from webpages and PowerPoint images into think-cell elements, and make edits to icons and SVGs. You can resize, crop, and align think-cell images so that they fit seamlessly into your slide layout.
For general instructions on formatting and arranging images, icons, and other think-cell elements, see Shapes and elements.
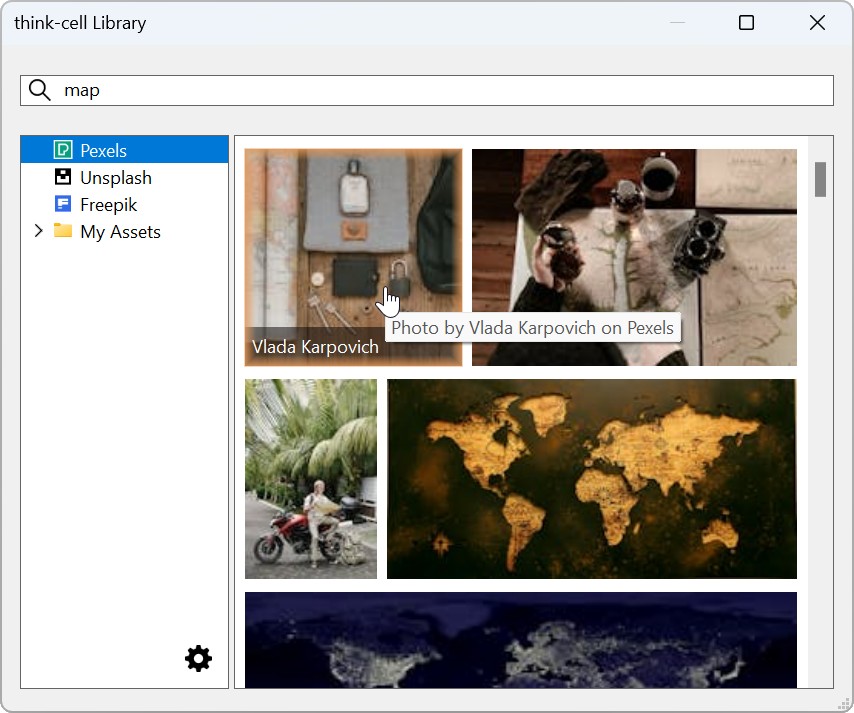
Insert library images and icons into presentations
In the think-cell Library, you can use image assets from local or shared storage, stock images from Pexels and Unsplash, and icons from Freepik without an additional subscription. If you have a subscription to Brandfolder, Canto, or Getty Images, you can use images from these sources as well.
To insert an image into your presentation, follow these steps:
- Open the think-cell Library: on the PowerPoint ribbon, go to the Insert tab. In the Slides group, select Library
 .
. -
In think-cell Library, select an image source:
- Pexels: Stock images
- Unsplash: Stock images
- Freepik: Icons
- A folder or subfolder that contains your image assets (see Your image assets in the library)
If you have a subscription to Brandfolder, Canto, or Getty Images, you can use these sources as well. To learn more, see Add image and icon providers to the library.

- In the search box, enter search terms. To filter and sort your search results, see Filter and sort images.
When browsing search results, to change the size of the thumbnails, hold Ctrl and rotate the mouse wheel to zoom in and out. On a touchpad, pinch and stretch. - Click the thumbnail of the image that you want to insert into your presentation.
- If you don't want to insert the image onto your current slide, select the slide that you want.
- On the slide, click where you want to insert the image.
To replace an image in the same position on a slide, double-click the current image, or select the current image and reopen the library. Then select a new image.
To adjust images on your slide, see Resize, crop, and align images.
Filter and sort images
Freepik, image asset folders, and Brandfolder have additional options for filtering and sorting search results.
Freepik
- Color: Select Black, Colors, Gradient, or All.
- Style: Select Outline, Fill, Lineal color, Hand drawn, or All.
- Sort by: Select Most relevant or Recent.
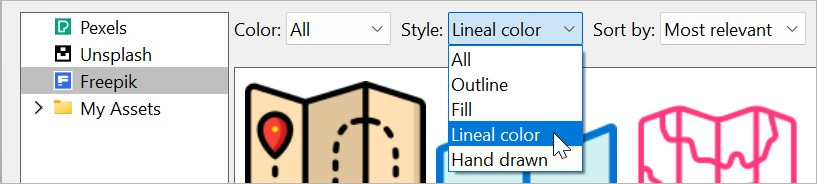
Image asset folders
On the Sort by menu, select one of these options:
- Location: Images appear alphabetically by folder name, then alphabetically by file name.
- Most recent: Images appear by last modified date from newest to oldest.

Brandfolder
- Brandfolder: Select a Brandfolder.
- Collection: Select a Collection in your Brandfolder.
- Section: Select a Section in your Brandfolder.
- Sort by: Select Updated (newest), Creation date (newest), Most popular, or File name (A-Z).
Edit icons and other SVG images
You can edit icons from Freepik or any other think-cell images that are based on scalable vector graphics (SVG) files. You can, for example, change an icon's colors or just use a part of the icon. After editing an icon, you can still use it as a think-cell image.
To edit an icon, follow these steps:
- On your slide, insert an icon from Freepik or another library image source.
- Right-click the icon to open the context menu, then select Convert Image to Shapes

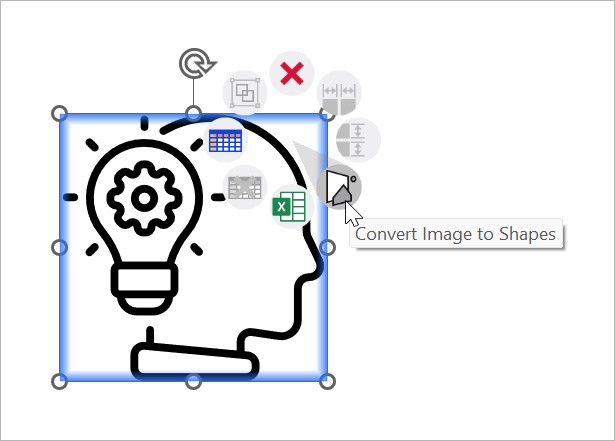
- Edit the PowerPoint shapes so that the icon looks the way that you want. For example, change the the shapes' colors, or add or remove some shapes.
- When you're finished, select all the shapes. If you've ungrouped the shapes or added new shapes, right-click the selection, then select Group > Group.
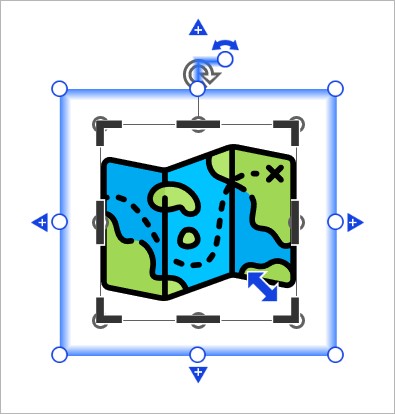
- On the Insert tab, in the think-cell group, select Tools

 . For more information, see Convert PowerPoint shapes into think-cell images.
Resize, crop, and align images
Learn to resize, crop, and align think-cell images for a seamless fit within your slide layout. think-cell has different image editing modes for photos and icons.
Image modes
think-cell has different image editing modes for photos and icons.
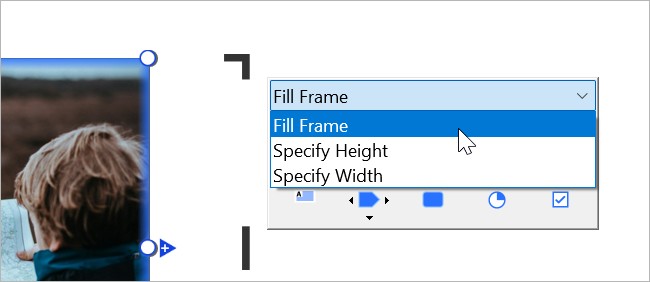
- We recommend Fill Frame mode for photos. In this mode, the image automatically adjusts to its bounding box, which is indicated by the blue selection frame. think-cell scales and crops the image as needed to fill the bounding box.

- We recommend Specify Height and Specify Width modes for icons. In these modes, you can specify the image's height or width independently of its bounding box. think-cell displays the full image without cropping.
To choose an image mode, select the image to open the mini toolbar. On the Image Mode menu, select the mode that you want.
Resize images
In Fill Frame mode, the image automatically scales to fill its bounding box, which is indicated by the blue selection frame. In Specify Width and Specify Height modes, you resize the image independently of the bounding box.
Resize images in Fill Frame mode
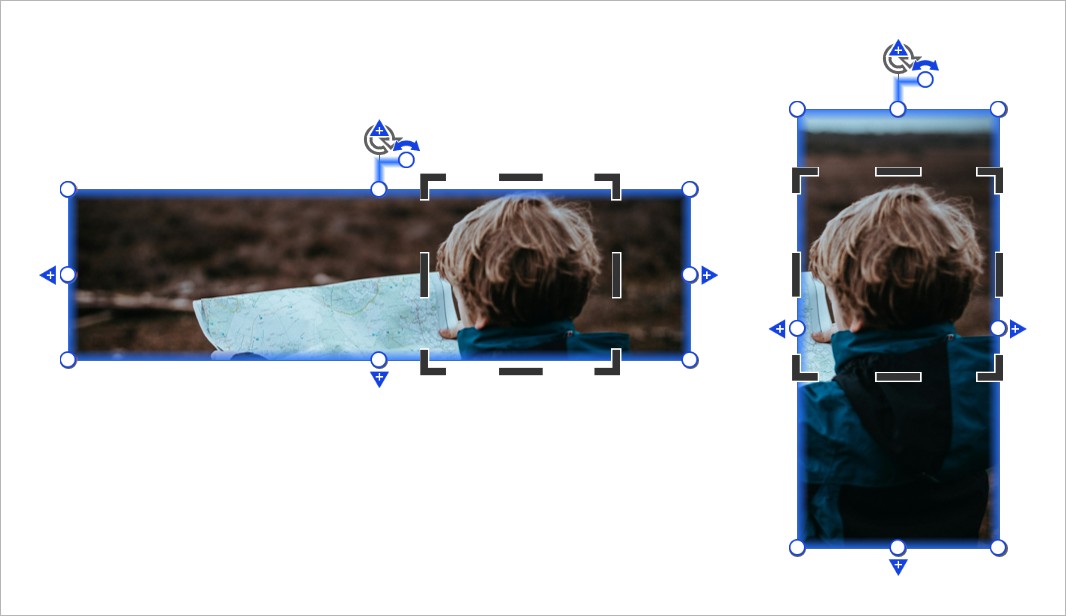
In Fill Frame mode, to resize an image, drag one of the image's resize handles.
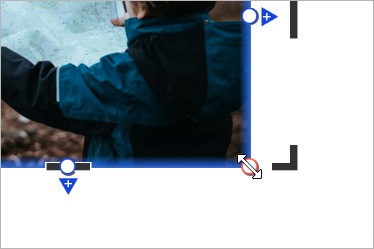
The image scales to fill the bounding box. If the bounding box's aspect ratio doesn't match the image's original dimensions, think-cell crops the image to make it fit. think-cell doesn't squeeze or stretch the image.
By default, the center of the image stays in focus when resizing. If you want a different part of the image to stay in focus, select this area with the crop region (see Crop images).
Resize images in Specify Height or Specify Width modes
In Specify Height and Specify Width modes, you can resize images using the blue sizing arrow, or you can specify the image's height or width on the mini toolbar. The image's size is independent of its bounding box.
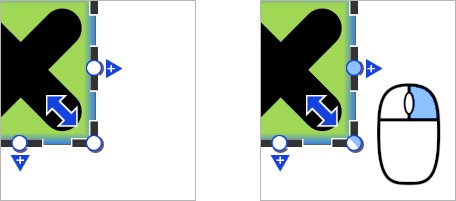
To resize an image with the blue sizing arrow, drag the arrow to increase or decrease the size.
To specify the height or width of an image on the mini toolbar, follow these steps:
- Select the image to open its mini toolbar. On the Image Mode menu, choose the dimension that you want to specify—that is, Specify Height or Specify Width.
- In the Size combo box, do one of the following:
- In the text box, enter a value and unit. For example, enter
12 mmor1/2 slide height. If you don't enter a unit, think-cell interprets the value in points (pt). - On the dropdown menu, select a size.
- In the text box, enter a value and unit. For example, enter
When resizing images, choose from the following units:
- Points (pt). Use this unit to easily match an icon's size to a font size on your slide.
- Millimeters (mm)
- Centimeters (cm)
- Inches (in)
- Proportion of slide width (slide width)
- Proportion of slide height (slide height)
Crop images
In Fill Frame mode, crop an image to define what stays in focus. When resizing a cropped image, you can change its aspect ratio independently of the crop region's dimensions. The image scales to fill the bounding box, which is indicated by the blue selection frame, while keeping the crop region as centered as possible.
In Specify Height or Specify Width mode, crop an image to remove outer edges that you don't want.
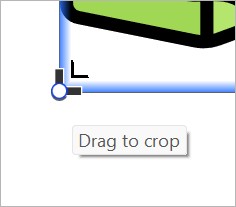
To crop an image in any mode, follow these steps:
- Select the image that you want to crop.
- Hover over one of the black crop handles until you see a black crop cursor. If you see a white double-ended arrow cursor, move your mouse just inside the selection frame so that you see a black crop cursor.
- Drag the black crop handle.
To restore the original image in any mode, follow these steps:
- Select the cropped image.
- Make sure that at least one side of the image is unlocked (see Unlock the edges of elements). An unlocked side has a blue resize handle. To unlock a side, right-click its resize handle.
- On the PowerPoint ribbon, go to the Picture Format or Graphics Format tab. In the Size group, select Crop > Fit.
Change an image's alignment within its bounding box
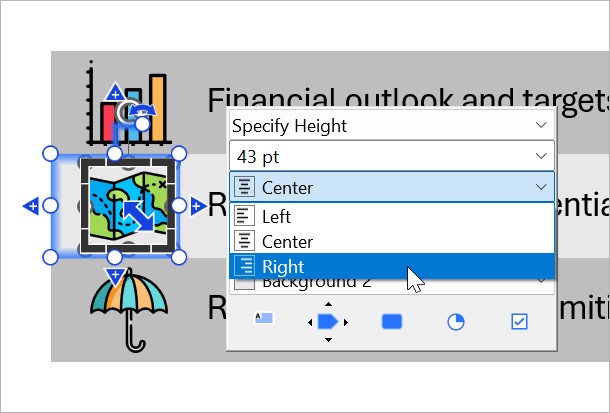
In Specify Height and Specify Width modes, you can change an image's alignment within its bounding box, which is indicated by the blue selection frame. By default, think-cell aligns the image in the center of the bounding box.
- In Specify Height or Specify Width mode, select the image to open the mini toolbar.
- On the mini toolbar, choose from the following options:
- On the Horizontal Alignment menu, select Left, Center, or Right.
- On the Vertical Alignment menu, select Top, Middle, or Bottom.
Insert images from webpages into presentations
Insert any image from a webpage into PowerPoint as a think-cell image. To do so, you need the think-cell browser extension (see Install the browser extension).
Caution: Most images on the internet are protected by copyright. If you use a copyrighted image in your presentation, make sure that you have permission to do so.
- Open the webpage that contains the image that you want to insert into PowerPoint. On your browser's toolbar, select the think-cell extension. If you frequently use the think-cell browser extension, you can pin it to the toolbar for convenience.
- Click the image that you want to insert. PowerPoint will open.
- If you don't want to insert the image or icon on the current slide, select the slide that you want.
- On the slide, click where you want to insert the image.
Convert PowerPoint shapes into think-cell images
You can use think-cell's arranging and resizing tools with PowerPoint images and other shapes. To do so, convert a PowerPoint shape or a group of shapes into a think-cell image.
- Select one or more PowerPoint shapes on your slide.
-
To merge a group of PowerPoint shapes into a single image, first select the shapes that you want to merge. Then right-click the selection and select Group > Group.
If you select multiple PowerPoint shapes without grouping them, each shape in your selection will convert to an individual think-cell image.
- On the Insert tab, in the think-cell group, select Tools
Need to troubleshoot?
Check our knowledge base