Imagens e ícones
Melhore suas apresentações com imagens think-cell, como ícones e imagens profissionais. As imagens funcionam perfeitamente ao lado de outros elementos think-cell, como gráficos, tabelas e caixas de texto.

Esta seção explica como adicionar imagens e ícones do think-cell Library, converter imagens de páginas da web e imagens do PowerPoint em elementos think-cell e fazer edições em ícones e SVGs. Você pode redimensionar, recortar e alinhar imagens think-cell para que elas se encaixem perfeitamente no layout do seu slide.
Para obter instruções gerais sobre formatação e organização de imagens, ícones e outros elementos do think-cell, consulte Formas e elementos.
Inserir imagens e ícones da Library em apresentações
Na Library think-cell, você pode usar recursos de imagem do armazenamento local ou compartilhado, imagens em arquivo da Pexels e Unsplash e ícones da Freepik sem uma assinatura adicional. Se você tiver uma assinatura do Brandfolder, Canto ou Imagens Getty, também poderá usar imagens dessas fontes.
Para inserir uma imagem em sua apresentação, siga estas etapas:
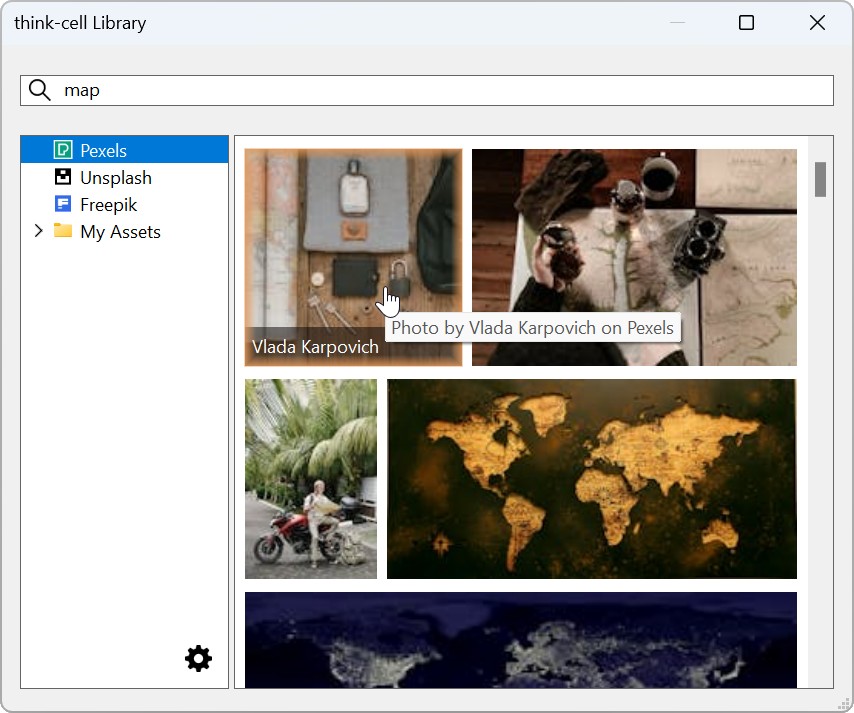
- Abra o think-cell Library: na faixa do PowerPoint, vá para a guia Insert. No grupo Slides, selecione Library
 .
. -
Em think-cell Library, selecione uma fonte de imagem:
- Pexels: imagens em arquivo
- Unsplash: imagens em arquivo
- Freepik: ícones
- Uma pasta ou subpasta que contém seus ativos de imagem (consulte Seus ativos de imagem na Library)
Se você tiver uma assinatura do Brandfolder, Canto ou Imagens Getty, também poderá usar recursos dessas fontes. Para saber mais, consulte Adicionar provedores de imagens e ícones à biblioteca.

- Na caixa de pesquisa, insira os termos de pesquisa. Para filtrar e classificar os resultados da pesquisa, consulte Filtrar e classificar imagens.
Ao navegar pelos resultados da pesquisa, para alterar o tamanho das miniaturas, mantenha pressionada a tecla Ctrl e gire a roda do mouse para aumentar e diminuir o zoom. Em um touchpad, aperte e estique. - Clique na miniatura da imagem que deseja inserir em sua apresentação.
- Se você não quiser inserir a imagem ou o ícone no seu slide atual, selecione o slide desejado.
- No slide, clique onde deseja inserir a imagem.
Para substituir uma imagem na mesma posição em um slide, clique duas vezes na imagem atual ou selecione a imagem atual e reabra a Library. Em seguida, selecione uma nova imagem.
Para ajustar as imagens no slide, consulte Redimensionar, cortar e alinhar imagens.
Filtrar e classificar imagens
O Freepik, as pastas de recursos de imagem e o Brandfolder oferecem opções adicionais para filtrar e classificar os resultados da pesquisa.
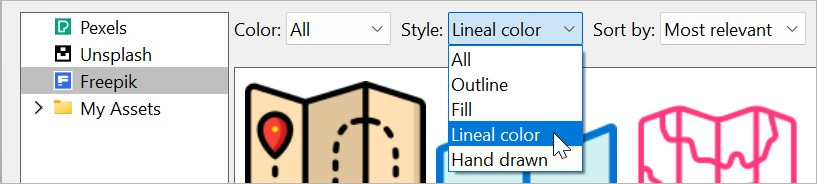
Freepik
- Color: selecione Black, Colors, Gradient, ou All.
- Style: selecione Outline, Fill, Lineal color, Hand drawn, ou All.
- Sort by: selecione Most relevant ou Recent.
Pastas de ativos de imagem
No menu Sort by, selecione uma destas opções:
- Location: as imagens aparecem em ordem alfabética pelo nome da pasta e, em seguida, em ordem alfabética pelo nome do arquivo.
- Most recent: as imagens aparecem pela última data modificada da mais recente para a mais antiga.

Brandfolder
- Brandfolder: selecione um Brandfolder.
- Collection: selecione uma coleção no Brandfolder.
- Section: selecione uma seção no Brandfolder.
- Sort by: selecione Updated (newest), Creation date (newest), Most popular, ou File name (A-Z).
Editar ícones e outras imagens SVG
Você pode editar ícones do Freepik ou qualquer outra imagem think-cell baseada em arquivos de gráficos vetoriais escaláveis (scalable vector graphics, SVG). Você pode, por exemplo, alterar as cores de um ícone ou apenas usar uma parte dele. Depois de editar um ícone, você ainda pode usá-lo como imagem think-cell.
Para editar um ícone, siga estas etapas:
- No slide, insira um ícone do Freepik ou de outra fonte de imagem do Library.
- Clique com o botão direito no ícone para abrir o menu de contexto, então selecione Convert Image to Shapes

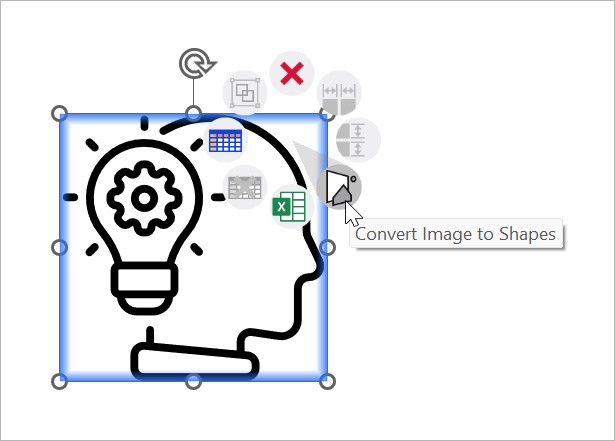
- Edite as formas do PowerPoint para que o ícone fique do jeito que você deseja. Por exemplo, altere as cores das formas ou adicione ou remova algumas formas.
- Quando terminar, selecione todas as formas. Se você desagrupou as formas ou adicionou novas formas, clique com o botão direito na seleção e selecione Group > Group.
- Na guia Insert, no grupo think-cell, selecione Tools

 . Para obter mais informações, consulte Converter formas de PowerPoint em imagens think-cell.
Redimensionar, cortar e alinhar imagens
Aprenda a redimensionar, recortar e alinhar imagens do think-cell para um ajuste perfeito dentro do layout do seu slide. O think-cell tem diferentes modos de edição de imagens para fotos e ícones.
Modos de imagem
O think-cell tem diferentes modos de edição de imagem para fotos e ícones.
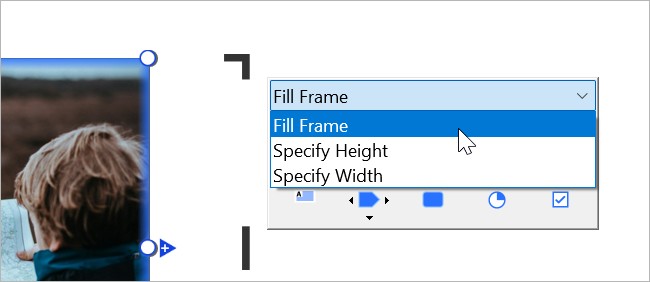
- Recomendamos o modo Fill Frame para fotos. Nesse modo, a imagem se ajusta automaticamente à sua caixa delimitadora, indicada pelo quadro de seleção azul. think-cell redimensiona e recorta a imagem conforme necessário para preencher a caixa delimitadora.

- Recomendamos modos Specify Height e Specify Width para ícones. Nesses modos, você pode especificar a altura ou largura da imagem independentemente da caixa delimitadora. O think-cell exibe a imagem completa sem recorte.
Para escolher um modo de imagem, selecione a imagem para abrir a minibarra de ferramentas. No menu Image Mode, selecione o modo desejado.
Redimensionar imagens
No modo Fill Frame, a imagem é dimensionada automaticamente para preencher sua caixa delimitadora, que é indicado pelo quadro de seleção azul. Nos modos Specify Width e Specify Height, você redimensiona a imagem independentemente da caixa delimitadora.
Redimensionar imagens no modo Fill Frame
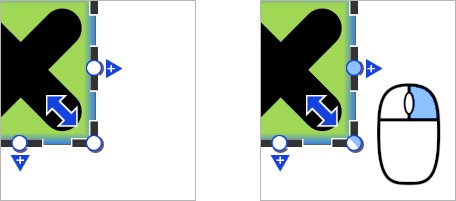
No modo Fill Frame, para redimensionar uma imagem, arraste uma das alças de redimensionamento da imagem.
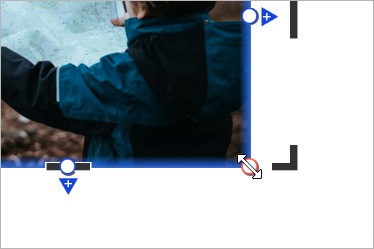
A imagem é dimensionada para preencher a caixa delimitadora. Se a proporção da caixa delimitadora não corresponder às dimensões originais da imagem, think-cell recorta a imagem para se ajustar. think-cell não comprimir nem estica a imagem.
Por padrão, o centro da imagem permanece em foco ao redimensionar. Se quiser que uma parte diferente da imagem permaneça em foco, selecione esta área com a região de corte (consulte Recortar imagens).
Redimensionar imagens nos modos Specify Width ou Specify Height
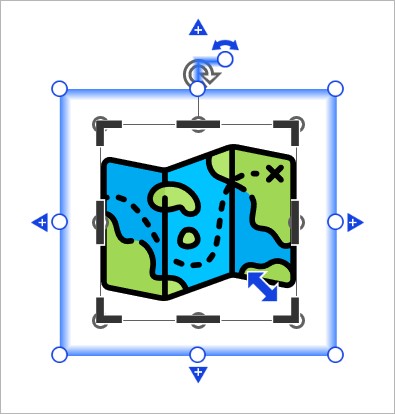
Nos modos Specify Height e Specify Width, é possível redimensionar imagens usando a seta azul de dimensionamento ou especificar a altura ou largura da imagem na minibarra de ferramentas. O tamanho da imagem é independente da sua caixa delimitadora.
Para redimensionar uma imagem com a seta de tamanho azul, arraste a seta para aumentar ou diminuir o tamanho.
Para especificar a altura ou largura de uma imagem na minibarra de ferramentas, siga estas etapas:
- Selecione a imagem para abrir sua minibarra de ferramentas. No menu Image Mode, escolha a dimensão que deseja especificar, Specify Height ou Specify Width.
- Na caixa de combinação Size, execute uma das seguintes ações:
- Na caixa de texto, insira um valor e uma unidade. Por exemplo, insira
12 mmou1/2 slide height. Se não inserir uma unidade, o think-cell interpreta o valor em pontos (pt). - No menu suspenso, selecione um tamanho.
- Na caixa de texto, insira um valor e uma unidade. Por exemplo, insira
Ao redimensionar imagens, escolha entre as seguintes unidades:
- Pontos (pt). Use esta unidade para combinar facilmente o tamanho de um ícone com o tamanho de uma fonte no seu slide.
- Milímetros (mm)
- Centímetros (cm)
- Polegadas (in)
- Proporção da largura do slide (slide width)
- Proporção da altura do slide (slide height)
Recortar imagens
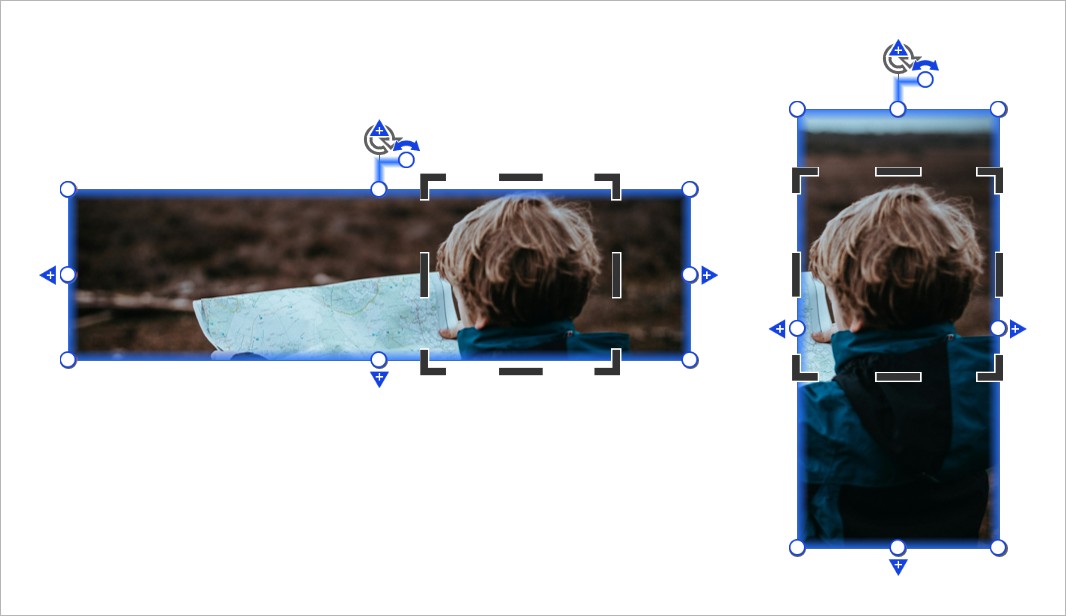
No modo Fill Frame, corte uma imagem para definir o que permanece em foco. Ao redimensionar uma imagem recortada, você pode alterar sua taxa de proporção independentemente das dimensões da região recortada. A imagem é dimensionada para preencher a caixa delimitadora, que é indicada pelo quadro de seleção azul, mantendo a região de corte o mais centralizada possível.
No modo Specify Height ou Specify Width, recorte uma imagem para remover bordas externas que você não deseja.
Para cortar uma imagem em qualquer modo, siga estas etapas:
- Selecione a imagem que deseja recortar.
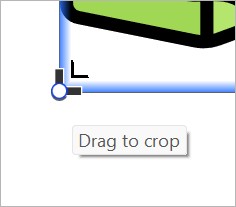
- Passe o mouse sobre uma das alças de corte pretas até ver um cursor de corte preto. Se você vir um cursor de seta dupla branco, mova o mouse dentro do quadro de seleção para ver um cursor de corte preto.
- Arraste a alça de corte preta.
Para restaurar a imagem original em qualquer modo, siga estas etapas:
- Selecione a imagem recortada.
- Certifique-se de que pelo menos um lado da imagem esteja desbloqueado (consulte Desbloquear as bordas dos elementos). Um lado desbloqueado tem uma alça de redimensionamento azul. Para desbloquear um lado, clique com o botão direito do mouse na alça de redimensionamento.
- Na faixa do PowerPoint, vá para a guia Picture Format ou Graphics Format. No grupo Size , selecione Crop > Fit.
Alterar o alinhamento de uma imagem dentro de sua caixa delimitadora
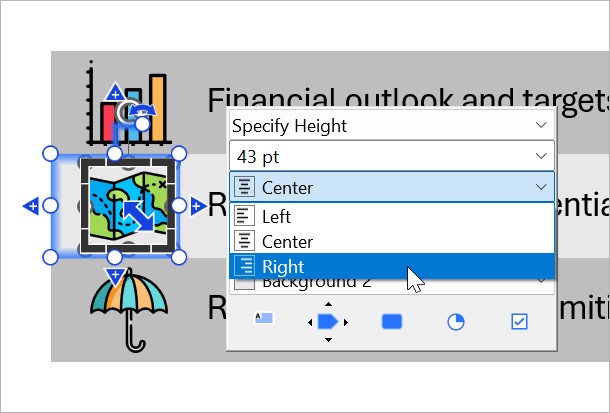
Nos modos Specify Height e Specify Width, você pode alterar o alinhamento de uma imagem dentro de sua caixa delimitadora, que é indicada pelo quadro de seleção azul. Por padrão, o think-cell alinha a imagem no centro da caixa delimitadora.
- Nos modos Specify Height ou Specify Width, selecione a imagem para abrir a minibarra de ferramentas.
- Na minibarra de ferramentas, escolha entre as seguintes opções:
- No menu Horizontal Alignment, selecione Left, Center ou Right.
- No menu Vertical Alignment, selecione Top, Middle ou Bottom.
Inserir imagens de páginas da web em apresentações
Insira qualquer imagem de uma página da web no PowerPoint como uma imagem think-cell. Para fazer isso, você precisa da extensão de navegador do think-cell (consulte Instalar a extensão de navegador).
Atenção: A maioria das imagens na internet é protegida por direitos autorais. Se você usar uma imagem protegida por direitos autorais em sua apresentação, certifique-se de ter permissão para fazer isso.
- Abra a página da web que contém a imagem que deseja inserir no PowerPoint. Na barra de ferramentas do navegador, selecione a extensão think-cell. Se você usa frequentemente a extensão do navegador do think-cell, pode fixá-la na barra de ferramentas do seu navegador para maior comodidade.
- Clique na imagem que você deseja inserir. O PowerPoint abrirá.
- Se não quiser inserir a imagem ou o ícone no slide atual, selecione o slide desejado.
- No slide, clique onde deseja inserir a imagem.
Converter formas de PowerPoint em imagens think-cell
Você pode usar as ferramentas de organização e redimensionamento do think-cell com imagens do PowerPoint e outras formas. Para fazer isso, converta uma forma de PowerPoint ou um grupo de formas em uma imagem think-cell.
- Selecione uma ou mais formas de PowerPoint no slide.
-
Para mesclar um grupo de formas do PowerPoint em uma única imagem, primeiro selecione as formas que deseja mesclar. Então clique com o botão direito do mouse na seleção e selecione Group > Group.
Se você selecionar várias formas do PowerPoint sem agrupá-las, cada forma em sua seleção será convertida em uma imagem think-cell individual.
- Na guia Insert, no grupo think-cell, selecione Tools
Precisa solucionar problemas
Confira nossa base de conhecimento