图像和图标
- Home
- 资源
- 用户手册
- think-cell Library:演示文稿资源
- 图像和图标
使用图标和图库图像等 think-cell 图像增强您的演示文稿。图像可与图表、表格和文本框等其他 think-cell 元素很好地配合使用。

本节介绍如何从 think-cell Library 添加图像和图标,如何将网页中的图像和 PowerPoint 图像转换为 think-cell 元素,以及如何对图标和 SVG 进行编辑。您可以调整 think-cell 图像的大小,以及裁剪和对齐这些图像,以使它们无缝适配幻灯片布局。
有关图片、图表及其他 think-cell 元素格式设置和排列的一般说明,请参阅 形状和元素。
将库中的图像和图标插到入演示文稿中
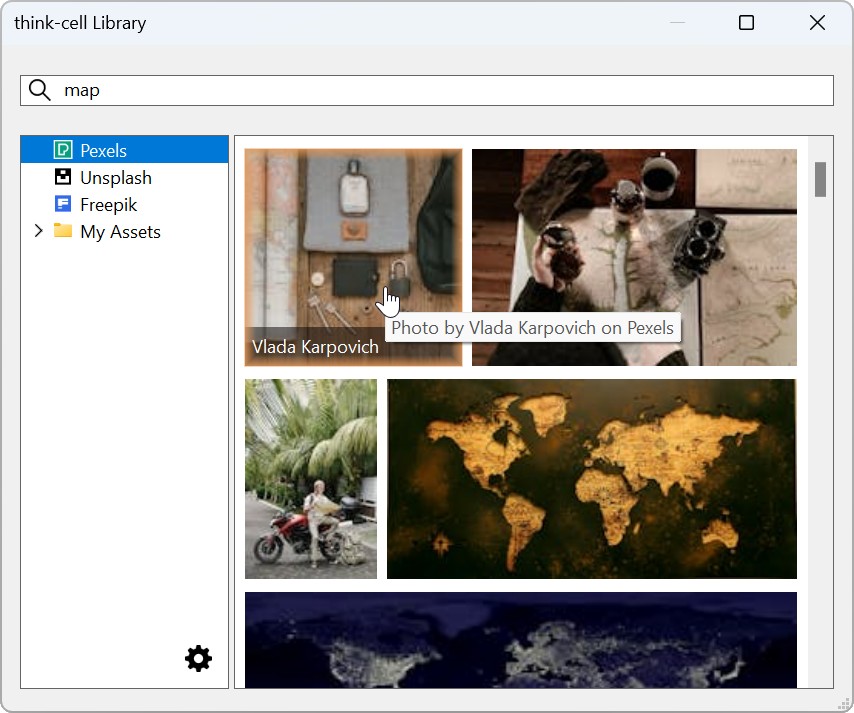
在 think-cell Library 中,您可以使用来自本地或共享存储的图像资产、来自Pexels 和 Unsplash 的图库图像以及来自 Freepik 的图标,无需额外订阅。如果您订阅了 Brandfolder、Canto 或 Getty Images,您也可以使用来自这些来源的图像。
若要将图像插入到演示文稿中,请按照以下步骤操作:
- 打开 think-cell Library:在 PowerPoint 功能区中,转到“Insert”选项卡。在 Slides 组中,选择“Library”
 。
。 -
在 think-cell Library 中,选择图像来源:
- Pexels:图库图像
- Unsplash:图库图像
- Freepik:图标
- 包含图像素材的文件夹或子文件夹(请参阅库中的图像资产)
如果您订阅了 Brandfolder、Canto 或 Getty Images,您也可以使用这些来源。如需更多信息,请参阅 将图像和图标提供程序添加到库中。

- 在搜索框中输入搜索词。若要对搜索结果进行筛选和排序,请参阅对图像进行筛选和排序。
浏览搜索结果时,若要更改缩略图的大小,请按住 Ctrl 并滚动鼠标滚轮进行缩放。在触摸板上,使用捏合和张开手势。 - 单击要插入到演示文稿的图像的缩略图。
- 如果您不想在当前幻灯片上插入图像,请选择所需的幻灯片。
- 在幻灯片上,单击要插入图像的位置。
若要在幻灯片上原位置替换图像,请双击当前图像,或者选择当前图像并重新打开库。然后选择新的图像。
若要调整幻灯片上的图像,请参阅调整图像大小,裁剪和对齐图像。
对图像进行筛选和排序
Freepik、图像资产文件夹以及 Brandfolder 有其他用于对搜索结果进行筛选和排序的选项。
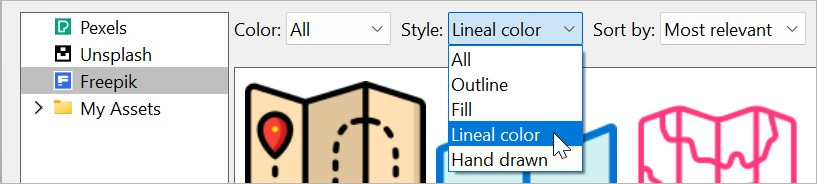
Freepik
- Color:选择“Black”、“Colors”、“Gradient”或“All”。
- Style:选择“Outline”、“Fill”、“Lineal color”、“Hand drawn”或“All”。
- Sort by:选择“Most relevant”或“Recent”。
图像资产文件夹
在“Sort by”菜单中,选择以下选项之一:
- Location:图像按文件夹名称的字母顺序显示,然后按文件名的字母顺序显示。
- Most recent:图像按上次修改日期从新到旧显示。

Brandfolder
- Brandfolder:选择 Brandfolder。
- Collection:在 Brandfolder 中选择某个集合。
- Section:在 Brandfolder 中选择某个部分。
- Sort by:选择“Updated (newest)”、“Creation date (newest)”、“Most popular”或“File name (A-Z)”。
编辑图标和其他 SVG 图像
您可以编辑来自 Freepik 或任何其他基于可缩放矢量图形 (SVG) 文件的 think-cell 图像的图标。例如,您可以更改图标的颜色,也可以只使用图标的一部分。编辑后的图标仍可用作 think-cell 图像。
若要编辑图标,请按照以下步骤操作:
- 在幻灯片上插入来自 Freepik 或其他库图像来源的图标。
- 右键单击图标以打开上下文菜单,然后选择“Convert Image to Shapes”

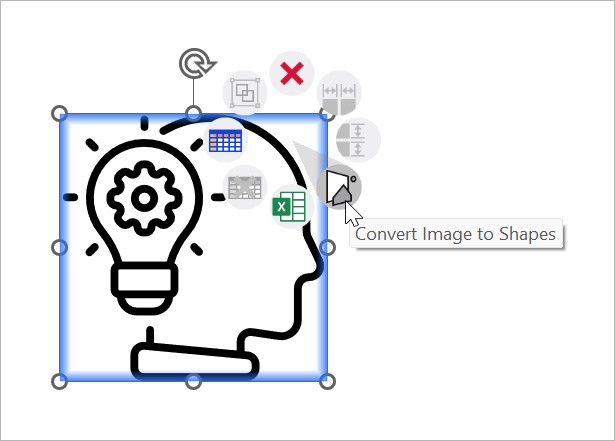
- 编辑 PowerPoint 形状,使图标的外观符合您想要的样子。例如,更改形状的颜色,或者添加或移除某些形状。
- 完成后,选择所有形状。如果您已取消形状分组或添加了新形状,请右键单击所选对象,然后选择“Group > Group”。
- 在“Insert”选项卡的 think-cell 组中,选择“Tools”

 。有关更多信息,请参阅 将 PowerPoint 形状转换为 think-cell 图像。
调整图像大小,裁剪和对齐图像
了解如何调整 think-cell 图像的大小以及裁剪和对齐这些图像,以使它们无缝适配幻灯片布局。think-cell 具有不同的图像编辑模式,适用于编辑照片和图标。
图像模式
think-cell 具有不同的图像编辑模式,适用于编辑照片和图标。
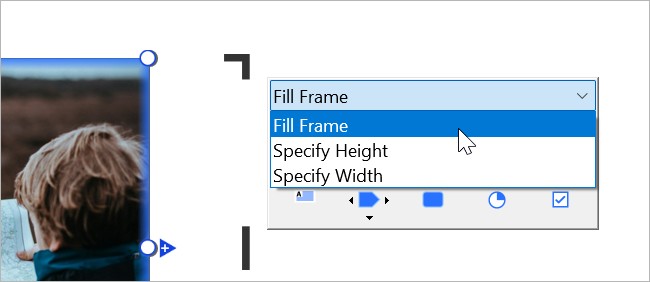
- 我们建议对照片使用Fill Frame模式。在这种模式下,图像会根据边界框自动调整(边界框用蓝色选择框表示)。think-cell 会根据需要缩放和裁剪图像以填充边界框。

- 我们建议对图标使用Specify Height和Specify Width模式。在这些模式下,您可以独立于图像的边界框指定图像的高度或宽度。think-cell 会显示完整图像而不进行裁剪。
若要选择图像模式,请选择图像以打开迷你工具栏。在“Image Mode”菜单中,选择所需的模式。
调整图像大小
在“Fill Frame”模式下,图像会自动缩放以填充边界框(边界框用蓝色选择构图表示)。在“Specify Width”和“Specify Height”模式下,可以独立于边界框调整图像大小。
在“Fill Frame”模式下调整图像大小
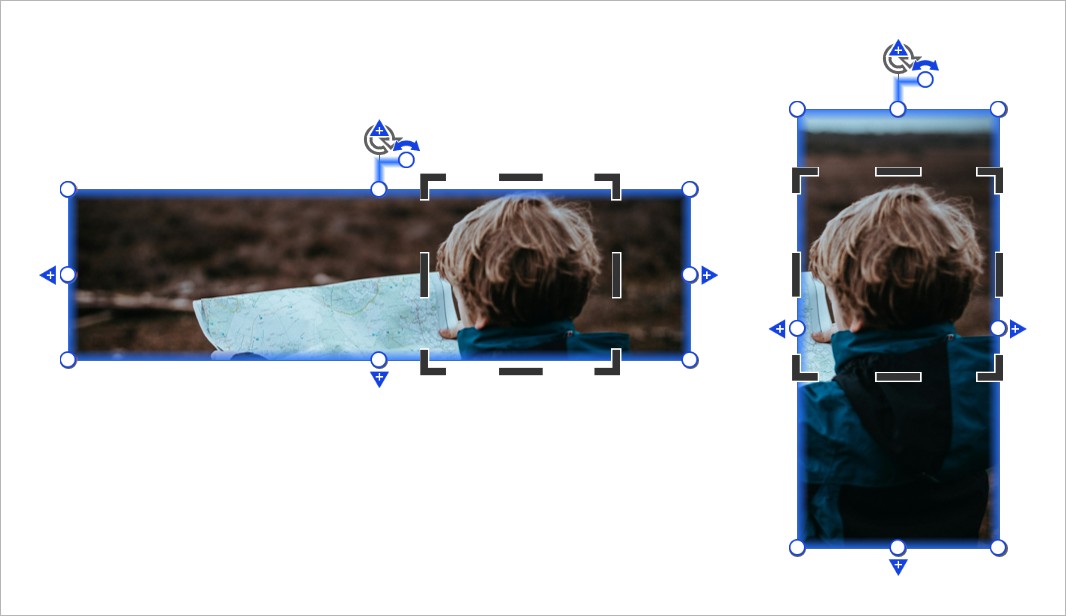
在“Fill Frame”模式下,若要调整图像大小,请拖动图像的一个调整大小图柄。
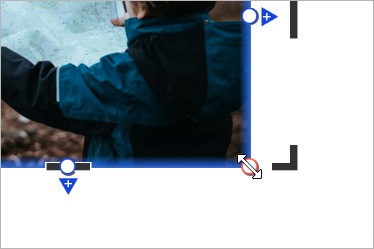
图像会缩放以填充边界框。如果边界框的纵横比与图像的原始尺寸不匹配,think-cell 会裁剪图像以使其适配。think-cell 不会挤压或拉伸图像。
默认情况下,调整大小时,图像的中心会保持对焦。如果您希望图像的其他部分保持对焦,请选择所需区域和裁剪区域(请参阅裁剪图像)。
在“Specify Height”或“Specify Width”模式下调整图像大小
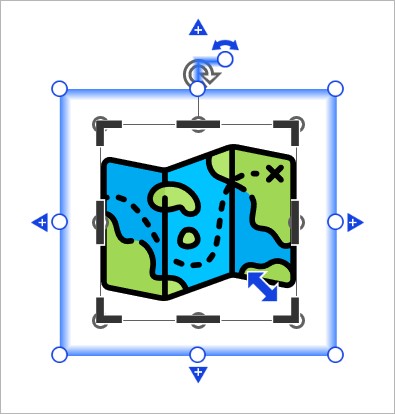
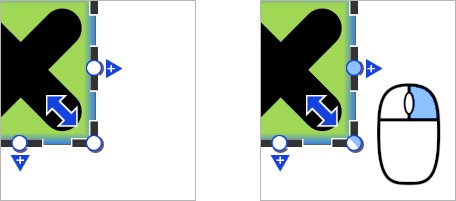
在“Specify Height”和“Specify Width”模式下,可以使用蓝色大小调整箭头调整图像大小,也可以在迷你工具栏中指定图像的高度或宽度。图像的大小与边界框无关。
若要使用蓝色大小调整箭头调整图像大小,请拖动箭头以增大或缩小图像。
若要在迷你工具栏中指定图像的高度或宽度,请按照以下步骤操作:
- 选择图像以打开其迷你工具栏。在“Image Mode”菜单上,选择要指定的维度,即“Specify Height”或“Specify Width”。
- 在“Size”组合框中,执行以下操作之一:
- 在文本框中,输入值和单位。例如,输入“
12 mm”或“1/2 slide height”。如果不输入单位,think-cell 会将磅 (pt) 作为值的单位。 - 在下拉菜单中选择大小。
- 在文本框中,输入值和单位。例如,输入“
调整图像大小时,请选择以下单位之一:
- 磅 (pt)。使用此单位可轻松使图标大小与幻灯片上的字体大小相匹配。
- 毫米 (mm)
- 厘米 (cm)
- 英寸 (in)
- 幻灯片宽度的比例 (slide width)
- 幻灯片高度的比例 (slide height)
裁剪图像
在“Fill Frame”模式下,裁剪图像以界定要保持对焦的内容。调整经过裁剪的图像的大小时,可以独立于裁剪区域的尺寸更改图像的纵横比。图像会缩放以填充边界框(边界框用蓝色选择构图表示),同时使裁剪区域尽可能居中。
在“Specify Height”或“Specify Width”模式下,裁剪图像以去除不需要的外边缘。
若要在任何模式下裁剪图像,请按照以下步骤操作:
- 选择要裁剪的图像。
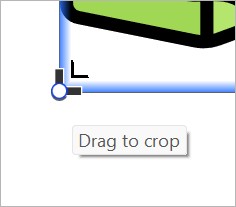
- 将鼠标悬停在其中一个黑色裁剪图柄上,直到看到黑色裁剪光标。如果看到白色双端箭头光标,请将鼠标移动到选择构图内,以便看到黑色裁剪光标。
- 拖动黑色裁剪图柄。
若要在任何模式下还原原始图像,请按照以下步骤操作:
- 选择经过裁剪的图像。
- 确保图像至少有一侧已解锁(请参阅 解锁元素的边缘)。已解锁的侧边带有蓝色的调整大小控制柄。若要解锁侧边,请右键单击其调整大小控制柄。
- 在 PowerPoint 功能区中,转到“Picture Format”或“Graphics Format”选项卡。在 Size 组中,选择“Crop > Fit”。
更改图像在边界框内的对齐方式
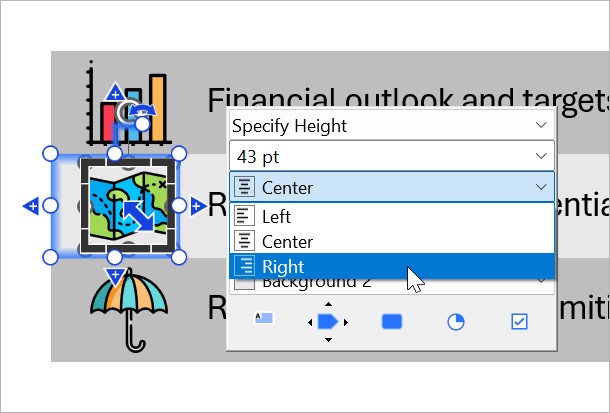
在“Specify Height”和“Specify Width”模式下,可以更改图像在边界框内的对齐方式(边界框用蓝色选择构图表示)。默认情况下,think-cell 会使图像在边界框内居中。
- 在“Specify Height”或“Specify Width”模式下,选择图像以打开迷你工具栏。
- 在迷你工具栏中,选择以下选项之一:
- 在“Horizontal Alignment”菜单中,选择“Left”、“Center”或“Right”。
- 在“Vertical Alignment”菜单中,选择“Top”、“Middle”或“Bottom”。
将来自网页的图像插入到演示文稿中
将网页中的任何图像作为 think-cell 图像插入到 PowerPoint 中。若要这样做,您需要 think-cell 浏览器扩展(请参阅安装浏览器扩展)。
请注意:互联网上的大多数图像都受版权保护。如果您在演示文稿中使用受版权保护的图像,请确保您有权这样做。
- 打开包含要插入到 PowerPoint 的图像的网页。在浏览器的工具栏中,选择 think-cell 扩展。如果您经常使用 think-cell 浏览器扩展,您可以将其固定到工具栏中,以方便使用。
- 单击要插入的图像。PowerPoint 将打开。
- 如果您不想在当前幻灯片上插入图像或图标,请选择所需的幻灯片。
- 在幻灯片上,单击要插入图像的位置。
将 PowerPoint 形状转换为 think-cell 图像
您可以使用 think-cell 的排列和大小调整工具来处理 PowerPoint 图像和其他形状。若要这样做,请将 PowerPoint 形状或一组形状转换为 think-cell 图像。
- 在幻灯片上选择一个或多个 PowerPoint 形状。
-
若要将一组 PowerPoint 形状合并为单个图像,请首先选择要合并的形状。然后右键单击所选对象并选择“Group > Group”。
如果选择多个 PowerPoint 形状而不对其进行分组,则所选的每个形状都将转换为单个 think-cell 图像。
- 在“Insert”选项卡的 think-cell 组中,选择“Tools”
需要排查问题
查看我们的知识库