Caselle di testo
- Home
- Risorse
- Manuale dell’utente
- think-cell Core: Elementi base della presentazione
- Caselle di testo
Le caselle di testo think-cell possono regolare automaticamente la loro dimensione e posizione per ottenere layout di diapositiva ottimali. Scopri come controllare il ridimensionamento automatico bloccando e sbloccando i bordi delle caselle di testo. Crea allineamenti dinamici con altri elementi think-cell in modo che, quando modifichi il testo, gli altri elementi si spostino e si ridimensionino per preservare l'allineamento.
Per istruzioni generali sulla formattazione e sull'organizzazione delle caselle di testo e di altri elementi think-cell, consulta Forme ed elementi.
Inserire caselle di testo think-cell
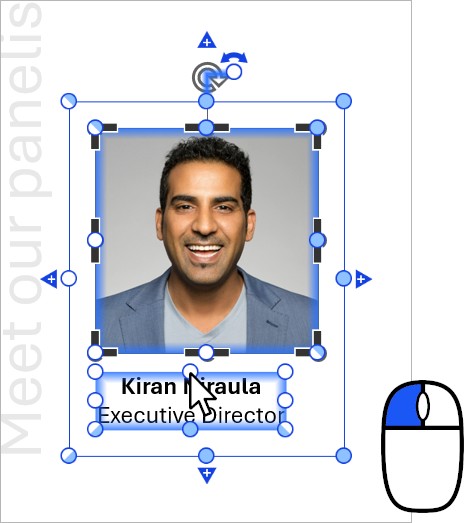
Per inserire una casella di testo nella diapositiva, segui questa procedura:
- Sulla barra multifunzione Insert di PowerPoint, vai al gruppo think-cell e seleziona Text Box
 .
. - Per inserire una casella di testo con la dimensione predefinita, fai clic nel punto in cui desideri inserire la casella di testo. Per inserire una casella di testo con una dimensione personalizzata, trascina per inserire la casella di testo con la dimensione desiderata.
- Inizia a digitare per inserire il testo nella casella di testo.
Ridimensionare automaticamente le caselle di testo in base al contenuto
Le caselle di testo possono essere ridimensionate automaticamente per adattarle al contenuto. Puoi attivare e disattivare il ridimensionamento automatico e scegliere la direzione in cui una casella di testo si espande o si restringe sbloccando e bloccando i bordi di una casella di testo.
Puoi anche utilizzare il ridimensionamento automatico con altri elementi think-cell che contengono testo o le cui dimensioni sono specificate in punti, tra cui Harvey Ball e caselle di controllo, pentagoni e galloni, Rettangoli arrotondati, Agenda e Immagini e icone.
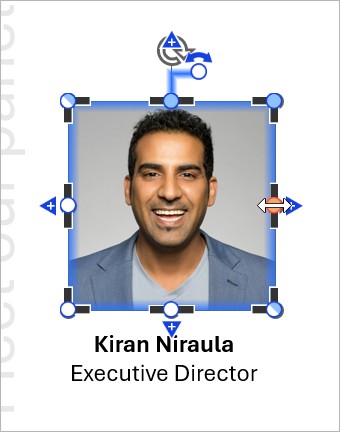
Un bordo sbloccato può spostarsi automaticamente per adattarsi al contenuto della casella di testo. Un lato sbloccato ha un punto 
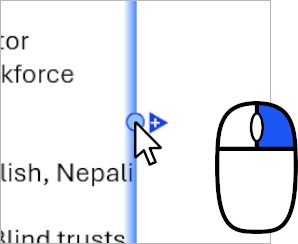
Un bordo bloccato non si sposta, anche quando il contenuto della casella di testo cambia. Un bordo bloccato ha un punto 
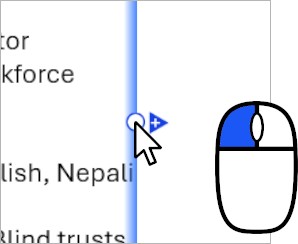
Per ulteriori informazioni, consulta Bloccare e sbloccare gli elementi.
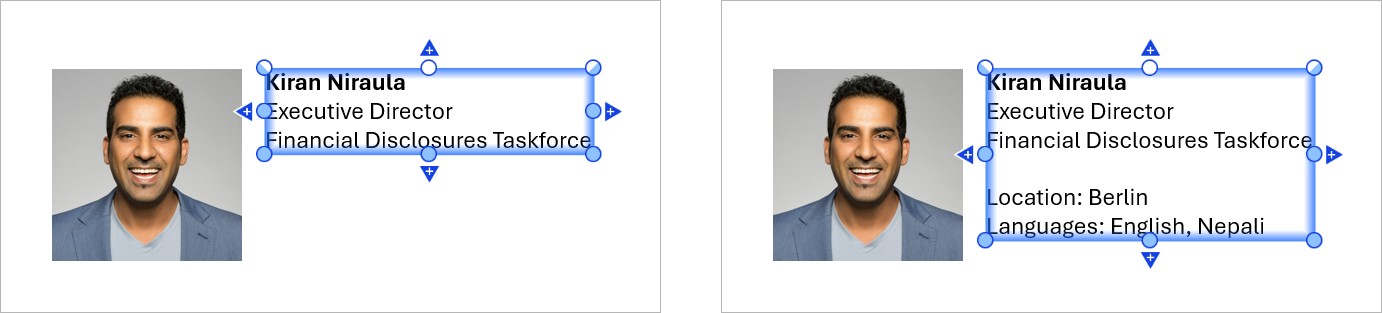
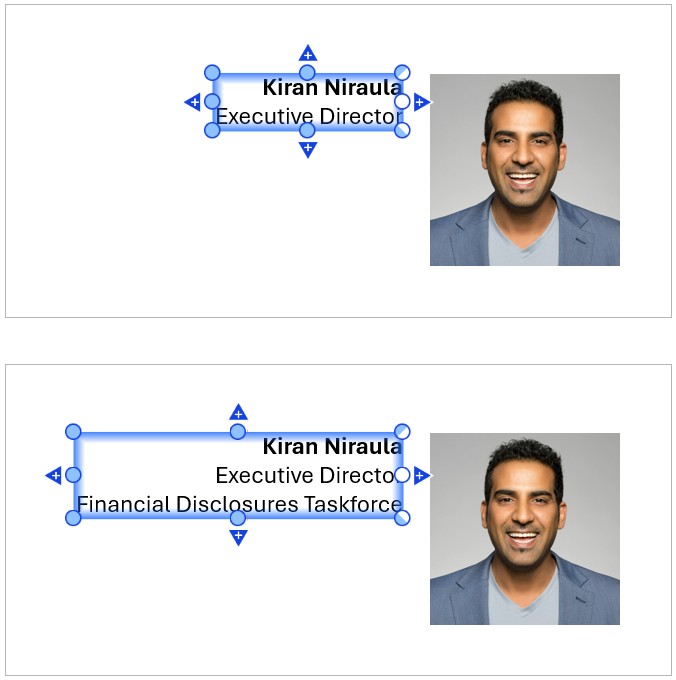
Esempi di ridimensionamento automatico
Per adattare automaticamente l'altezza della casella di testo al suo contenuto in modo che il bordo superiore rimanga bloccato e quello inferiore si espanda o si restringa, blocca il bordo superiore e sblocca il bordo inferiore.
Per adattare automaticamente la larghezza della casella di testo al suo contenuto in modo che il lato sinistro si espanda o si restringa e il bordo destro rimanga bloccato, sblocca il bordo sinistro e blocca il bordo destro.
Per disattivare il ridimensionamento automatico dell'altezza della casella di testo, bloccane i bordi superiore e inferiore.
Per disattivare il ridimensionamento automatico della larghezza della casella di testo, bloccane i bordi sinistro e destro.
Allineare dinamicamente le caselle di testo con altri elementi
Puoi creare allineamenti dinamici tra caselle di testo e altri elementi think-cell. Quando modifichi il testo, gli altri elementi si spostano o si ridimensionano per preservare l'allineamento.
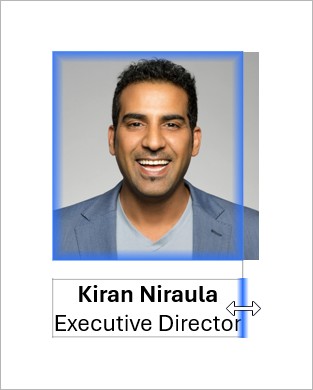
Ad esempio, puoi allineare una casella di testo e un'immagine in modo che l'immagine corrisponda sempre alla larghezza della casella di testo, anche se rendi il testo più lungo o più corto.

Puoi creare un allineamento dinamico lungo i bordi superiore, inferiore, sinistro o destro di un elemento. In questo esempio, i bordi destri dell'immagine e della casella di testo sono allineati dinamicamente, come indicato da una sottile linea grigia tra i bordi. Una volta spostato uno degli elementi o alcuni bordi, l'allineamento dinamico si interrompe (consulta Interrompere gli allineamenti dinamici).
Puoi anche creare allineamenti dinamici utilizzando altri elementi think-cell che contengono testo o le cui dimensioni sono specificate in punti, tra cui Harvey Ball e caselle di controllo, pentagoni e galloni, Rettangoli arrotondati, Agenda e Immagini e icone.
Per creare un allineamento dinamico tra una casella di testo e un altro elemento, segui questa procedura:
-
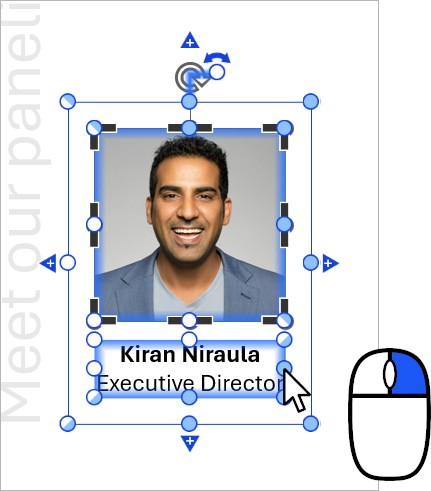
Prima di allineare dinamicamente i bordi desiderati (in questo esempio, i bordi destri dell'immagine e della casella di testo), puoi bloccare alcuni degli altri bordi degli elementi in modo che non si muovano quando si modifica il testo. Un bordo bloccato ha un punto
In questo esempio, i seguenti bordi sono bloccati:- I bordi sinistri dell'immagine e della casella di testo, per preservarne l'allineamento.
- Il bordo inferiore dell'immagine e il bordo superiore della casella di testo, per preservare lo spazio tra loro.
- Seleziona uno degli elementi che desideri includere nell'allineamento dinamico, ad esempio l'immagine.
- Inizia a trascinare il punto di ridimensionamento del bordo che desideri allineare; in questo esempio, il punto del bordo destro.
- Durante il trascinamento del punto di ridimensionamento, sposta il puntatore del mouse sul bordo dell'altro elemento a cui desideri allinearlo. Il bordo a cui lo stai allineando è evidenziato in blu e tra i bordi compare una linea sottile. Rilascia il pulsante del mouse.
- Assicurati che i bordi che desideri allineare dinamicamente siano sbloccati, ad esempio i bordi destri dell'immagine e della casella di testo. Un lato sbloccato ha un punto
Quando modifichi il testo, l'allineamento dinamico persiste. In questo esempio, l'immagine viene ridimensionata in modo che il bordo destro dell'immagine sia sempre allineato al bordo destro della casella di testo.

Interrompere gli allineamenti dinamici
Le seguenti azioni interromperanno un allineamento dinamico bloccando uno o più bordi:
- Sposta uno degli elementi allineati dinamicamente.
- Fai clic con il pulsante sinistro del mouse sul punto di ridimensionamento di un bordo allineato dinamicamente.
- Trascina il punto di ridimensionamento di un bordo allineato dinamicamente.
- Trascina il punto di ridimensionamento di un bordo opposto a un bordo allineato dinamicamente. Ad esempio, se il bordo destro è allineato dinamicamente, lo spostamento del bordo sinistro interrompe l’allineamento.
Hai bisogno di risolvere un problema
Consulta la nostra Knowledge Base